Objectives when testing a security key with passkeys?
To test the functionality of a security key using the Passkeys Debugger. This will verify that the external hardware-based security key (e.g., YubiKey, Google Titan) works correctly for both passkey creation and passkey login.
Prerequisites for testing a security key with passkeys
- A device (e.g., laptop, desktop) with a USB port or NFC support.
- A web browser that supports WebAuthn (latest versions of Chrome, Firefox, Edge, or Safari).
- A hardware security key (e.g., YubiKey, Google Titan Key).
Devices that are needed to test passkeys with a security key
- Device A: The testing will be conducted on a device that can connect to a hardware security key via USB or NFC.
- Device B: The security key that will be used to store the passkey.
Outcome
We will generate a test for creating a passkey on a security key that can be shared with other developers, archived in documentation, or used as a bug report. As we test passkeys, we will use a resident key.
Step-by-step Guide – How to test a security key with passkeys?
- Start debugging: Open a fresh Passkeys Debugger session: Navigate to https://www.passkeys-debugger.io on Device A. In case you already used it on the device, click "Reset state".
- Prepare debugging: Validate that your browser supports WebAuthn: Take a look at the first two boxes:
- WebAuthn needs to be ticked
- If WebAuthn is not ticked: You must be using a very old or a managed corporate browser because today WebAuthn coverage is nearly 100%.
- Passkey Creation – Select Tab “Passkey Creation”: Under the 'Passkey Creation' tab, set the 'Authenticator Attachment' setting to 'Cross-Platform' to indicate that an external security key will be used.
- (Optional) Passkey Creation - Configure Additional Settings: For a standard passkey test, you can leave all options on the default setting.
- Passkey Creation - Start: Click the 'Start Passkey Creation' button. The browser will prompt you to insert or connect your security key.
- Passkey Creation - Complete: Insert the security key into the USB port or tap it on an NFC reader and touch the key's sensor to authenticate the passkey creation.
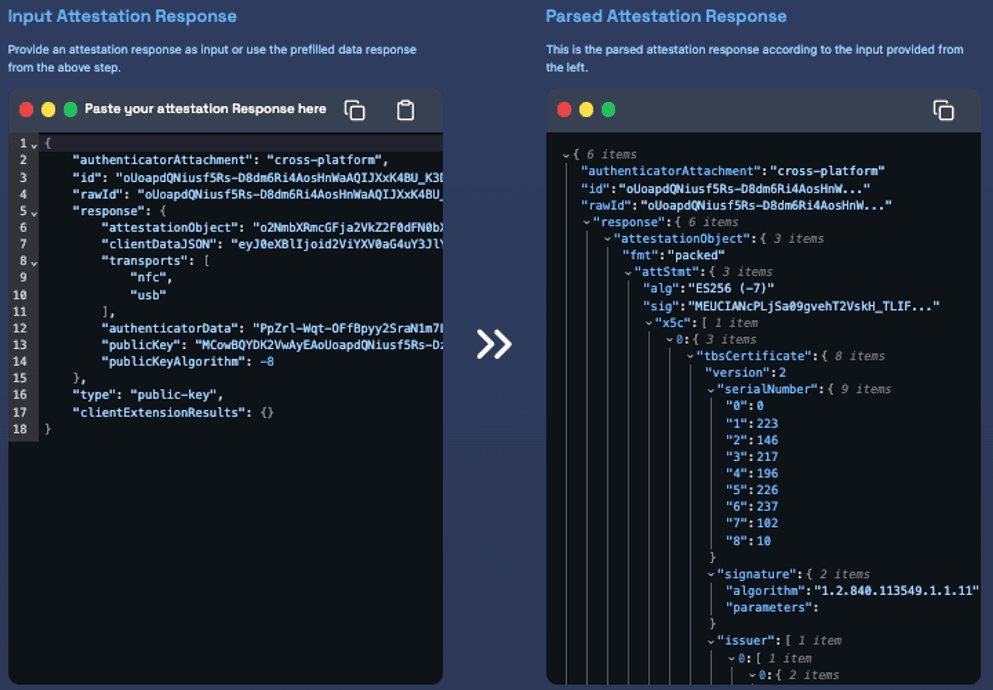
- Passkey Creation - Review Attestation Response: Check the 'Parsed Attestation Response' to verify that the security key successfully generated the attestation object.
- On the top side: You can see the raw version of the attestation response that is not decoded yet.
- On the bottom side: You can see the parsed version of the attestation response. It has been decoded. You can see that the security key provides an attestation statement.
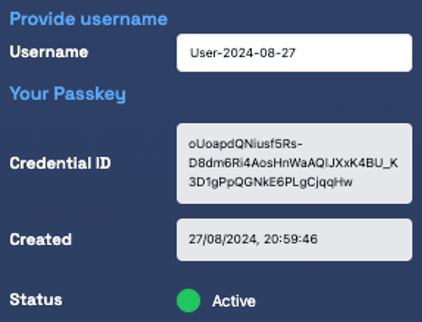
- At the top of the page, you will notice the passkey has been created, with the Username you have provided or the default Username.
- Passkey Login – Select Tab “Passkey Creation”: Change to the "Passkey Login" tab.
- (Optional) Passkey Login - Configure Additional Settings: For a standard security key passkey login, you can leave all options on their default settings. After you have created the passkey the Credential Transport will be filled with ["nfc", "usb"] which will trigger the security key login.
- Passkey Login – Start: Click the 'Start Passkey Login' button. The browser will prompt you to insert, connect your security key again and/or enter your security key pin.
- Passkey Login - Complete: Insert the security key into the USB port or tap it on an NFC reader and touch the key's sensor / enter PIN to authenticate the login.
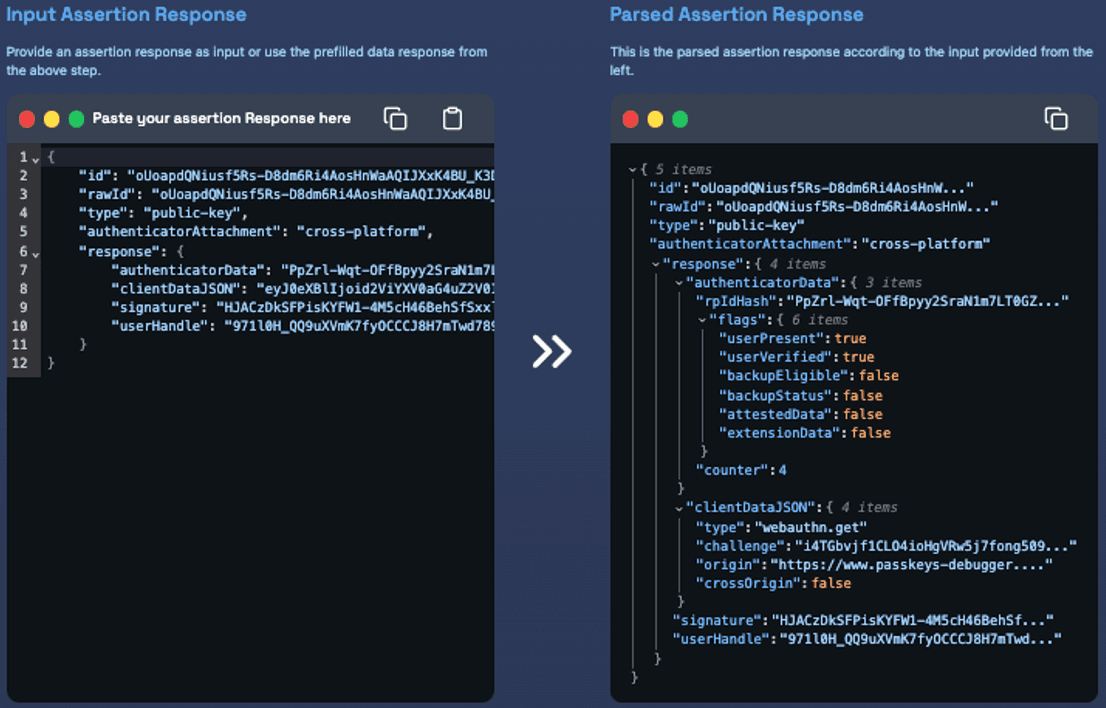
- 12. Passkey Login - Review Assertion Response: Check the 'Parsed Assertion Response' to verify that the security key successfully generated the assertion response.
- On the top side: You can see the raw version of the assertion response that is not decoded yet.
- On the bottom side: You can see the parsed version of the assertion response. It has been decoded.
- - Device-bound passkey: The flags are easily readable you will see that backedupEligible & backedStatus are both false, as passkeys on security keys are device bound.
- - User verification: You can find out of strong user verification has been completed by verifying userPresent & userVerified are both true.
- Share debugging result: You have concluded and recorded a full testing session, all information can now be shared with the URL of your test. You can:
- Re-visit the test: You can revisit your testcase in the future. You may want to link the Passkey Debugger directly in your Wiki.
- Use results: You can let other people create test cases for you on rare devices and send you the results.
- Start testing different options: You can now go back and test different settings and scenarios.
- Look at recorded meta-data: Additional information is recorded with the test, so you can lookup in which device (user-agent, client hints) and under which configuration it has been completed (Bluetooth).


You can find our test with a Yubikey here.
Implementation guides for many frameworks
Implementing passkeys in your framework
Explore our comprehensive guides on implementing passkeys across various frameworks and languages.
Passkeys for Large-Scale B2C Enterprise Applications
Deploy Passkeys Without User Migration
Try Corbado Connect- No user migration required
- real-time analytics coverage
- 10x higher passkey adoption
- Up to 90% SMS OTP cost savings
Get free passkey support
Join our Passkeys Community
Get support from our passkeys community for any kind of passkey-related question or issue you face
 +400 devs & product managers
from